To integrate automated Sprint Retrospective surveys after every sprint that closes in Jira, you can do so by connecting Polly and Jira with Zapier in a few simple steps, with minimal coding or technical knowledge required.
Let's go over the steps below.
1. Creating an API token and setting up your workflow
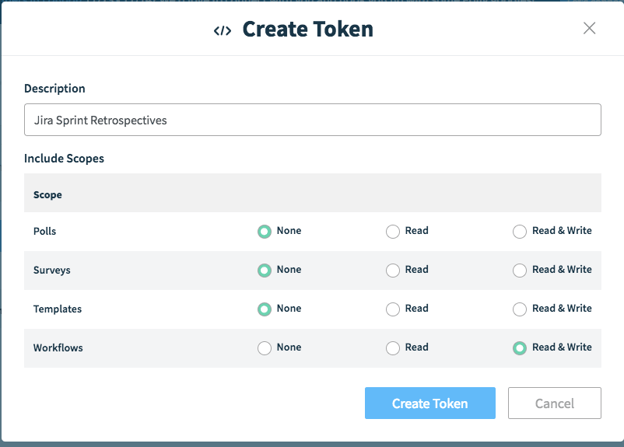
- First, go to https://app.polly.ai/api
- Create a new token with read/write access to Workflows.
-
Once you've created the token, you'll need to reveal and copy this token. The token will come into use while configuring your Zapier action.
-
Next comes the workflow setup. Go to Workflows → Create Custom Workflow.
Set up an API triggered workflow similar to the one below:
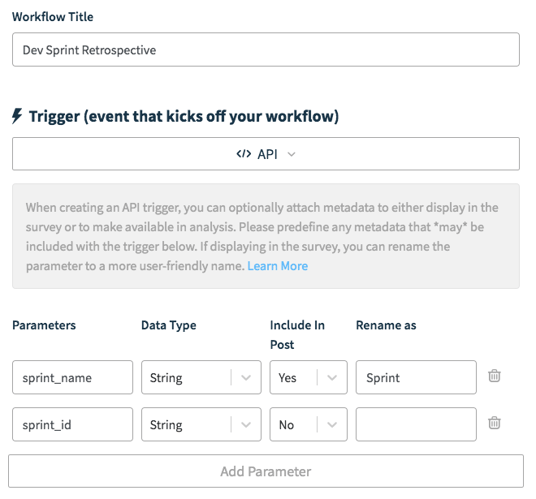
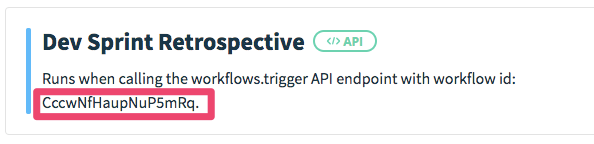
Once the ⚡trigger is set up, you can select the appropriate Sprint Retrospective survey to send to your team — we have one available as a template, or you can use your own custom template. Find the workflow you created in your workflows list and note the ID specified in the description of the workflow.
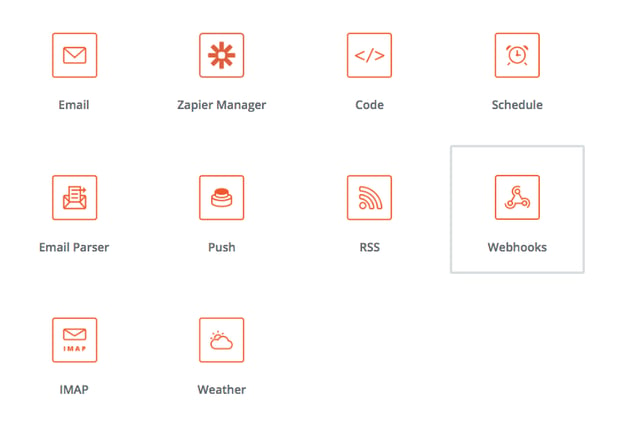
2. Create a Webhook Zap in Zapier
- If you have a Zapier account, then you know the drill: click on Make a New Zap from the Zaps tab to get started.
- From "Built-in apps", select Webhooks
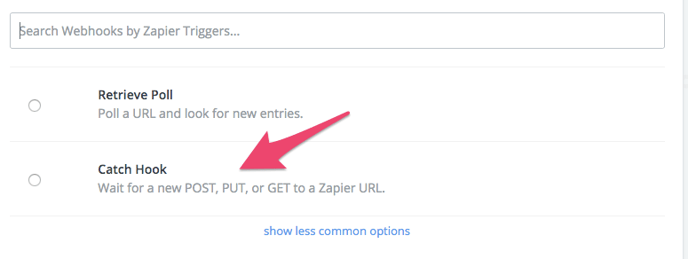
- Select Catch Hook
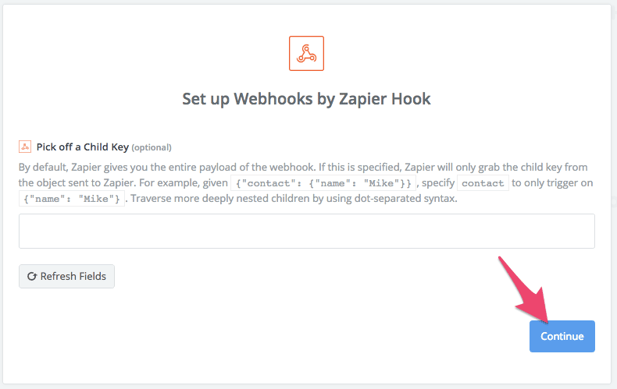
- You don't need to specify anything in the fields screen, just click Continue.
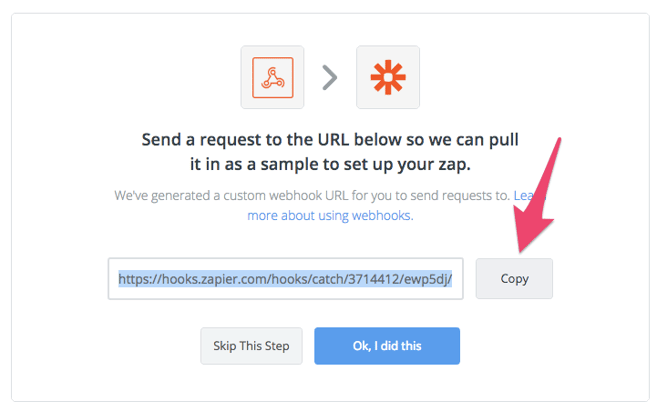
- Copy the webhook URL then click Ok, I did this
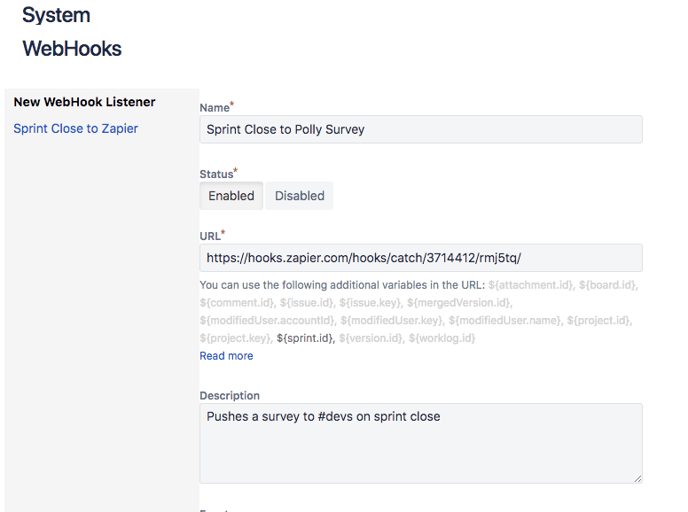
3. Create a webhook in Jira
- Once you've set up your Zap, next we'll need to create a webhook in Jira that will let Polly know every time your sprint has closed.
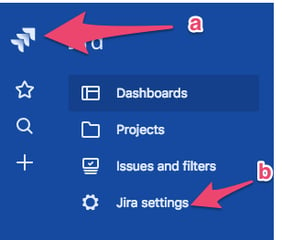
- Go to the Jira system dashboard (a), then select Jira Settings (b)
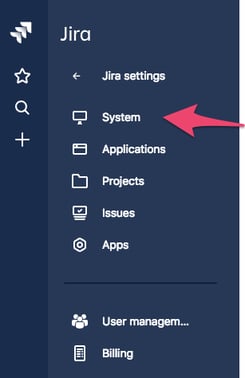
- Select System
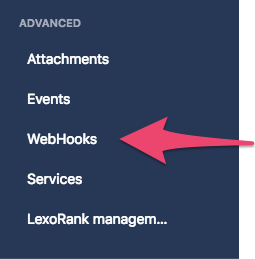
- Scroll down the sidebar and select WebHooks
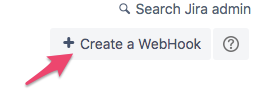
- Click the Create a WebHook button located at the top right
- Fill in the regular form details
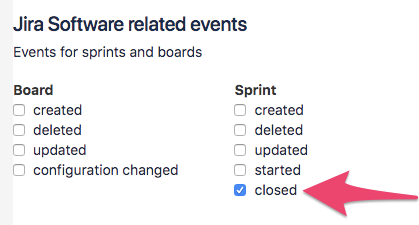
- Under Jira Software related events, check the Sprint → Closed checkbox☑️
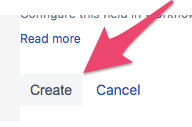
- Finally, click the Create button to finish up creating a webhook in Jira.
4. Call into Polly's API with the sprint closed event
You can now test the Zapier hook by closing a test sprint in Jira, or simply skip the testing part of Zapier and click Continue.
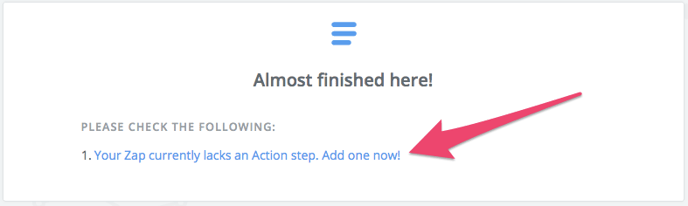
You'll see that the trigger has now been defined with the closed sprint in Jira, but now you need to set up the action that takes place whenever the trigger is hit. In this case, a sprint retrospective survey is the "action".
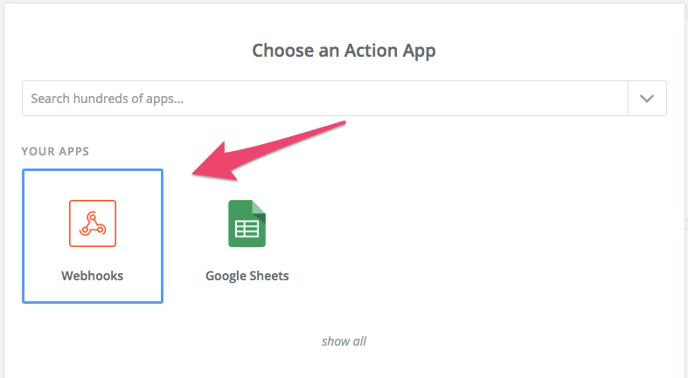
- Within Zapier, click on Add Action to start.
- From the Choose an Action App select Webhooks
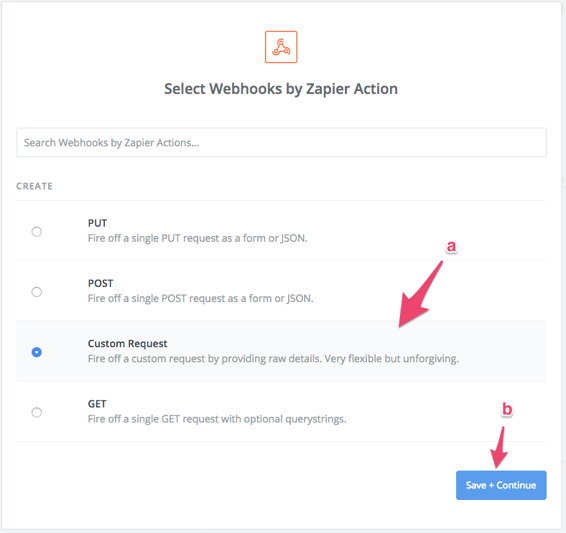
- Select Custom Request and then click Save + Continue
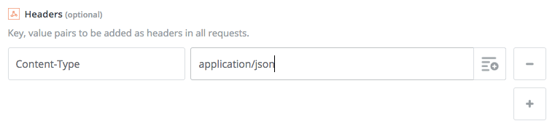
- Configure the webhook as shown below
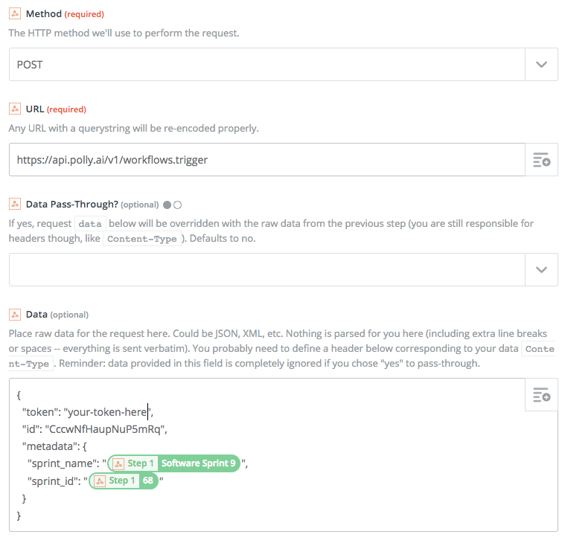
The token field should be the one you generated in the first step and the ID should be the one that you captured after creating the workflow.
-
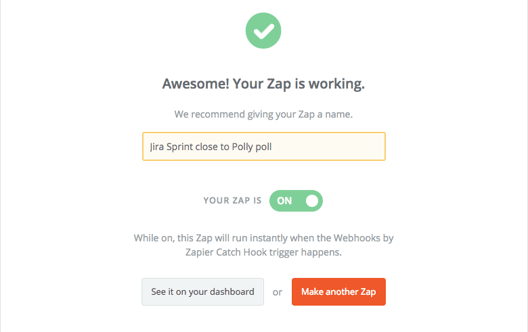
Save the Zap and turn it on.
You can test it at this step or you can skip it. Your workflow should be set up and will send whenever a sprint closes in Jira. 🎉