This workflow is setup using a Google Calendar account that can be invited to any meeting that you would like to collect feedback about.
It's recommended to use a shared account like meetingfeedback@yourcompany.com so that anyone in your organization can add this user as an invitee to their meeting and automatically receive post-meeting feedback from their meeting attendees.
The workflow will be setup in such a way that only calendar events that have invited the shared account to the meeting will be used to trigger the meeting effectiveness workflow, and only those colleagues that accepted the meeting invite will be sent the polly.
Before you begin, you will need the following:
- Zapier, with ability to run code steps
- Access to the shared Google Calendar credentials
- Polly Enterprise with Workflow functionality enabled
Step 1: Create a template to use in your workflow
Go to the Polly Dashboard and create a new polly to save as a template.
OR skip this step and use our existing Meeting Feedback template with pre-filled questions.
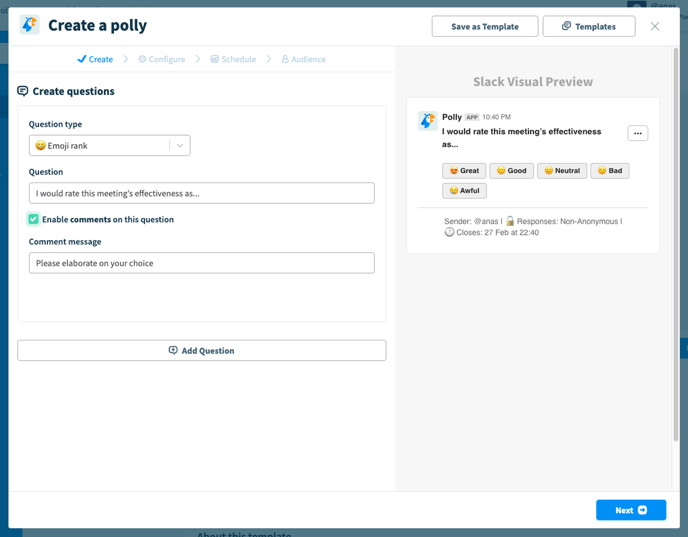
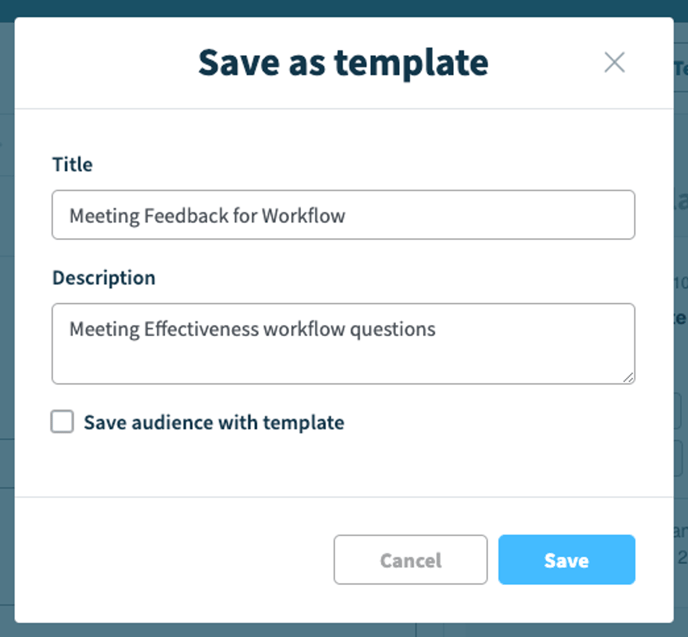
Hit Save as Template when you’re done creating your questions
Note: To ensure that you're happy with how the polly will look once its triggered by the workflow, send a test polly to yourself / your team members and fill it out before you proceed to the next step.
Step 2: Create and setup the workflow
Go to Workflows, and then click Create Workflows, and then Custom Workflow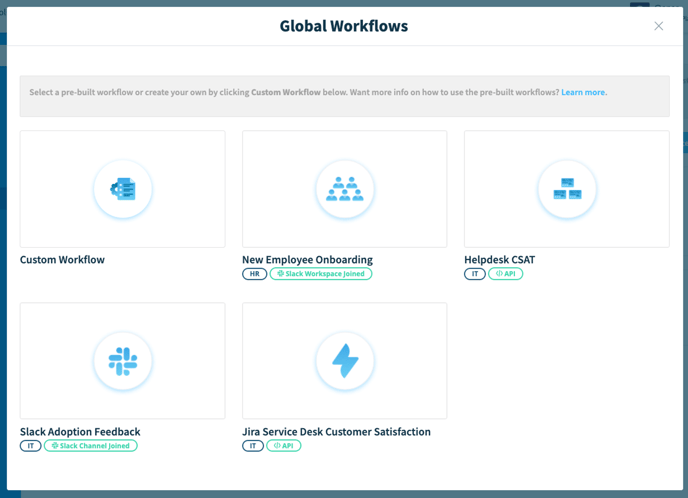
Set a title, and then choose the API trigger
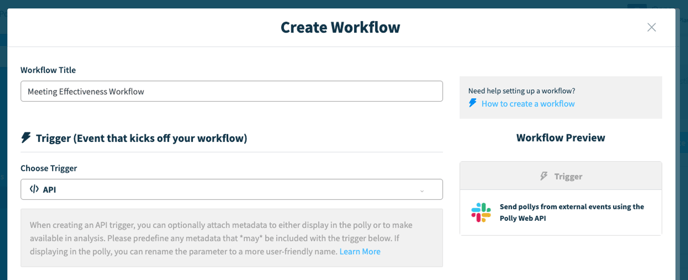
Add the API parameters that you would like to include in your polly, which will be passed through to Polly, e.g. the meeting title, or the meeting organizer’s name.
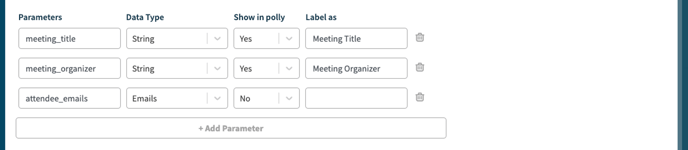
Selecting Yes in Show in polly will show the data from the parameter(s) as part of the message that gets sent to recipients in Slack.
Use parameters that will allow them to identify which meeting they are being surveyed about, or any other params that make sense in the context of the calendar event. The best way to view available params is during the Zapier event testing in Step 4.
Ensure that one of the parameters is attendee_emails, with Data Type = Emails, so that these values can be picked up from the Google Calendar events and sent to Polly. These same values will be used to send the pollys in Slack to users with matching email addresses.
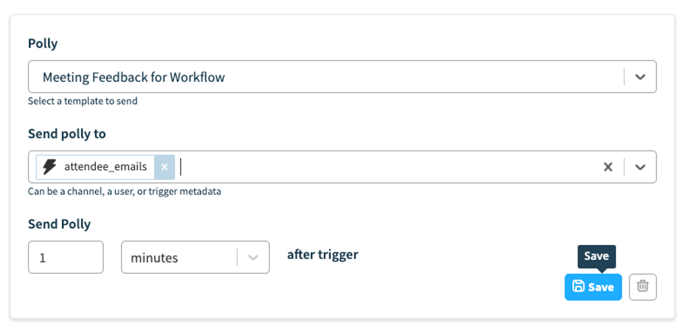
Next, select your template from Step 1

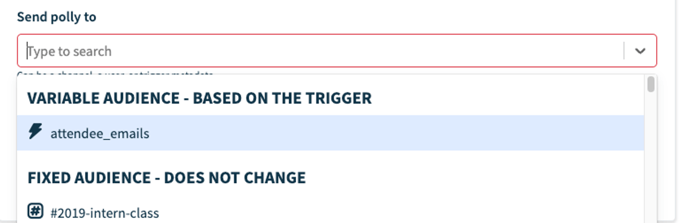
Select the Email data type API parameter from Step 2 as the Variable Audience trigger
Set the time delay between the event ending and attendees receiving the polly. We recommend keeping this relatively short so that the attendees have the proper context while responding. For the purposes of testing, let keep it at 1 minute.
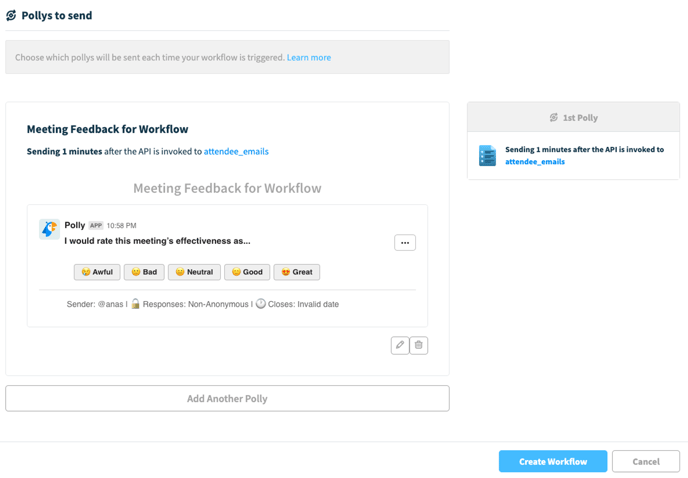
Check that everything is to your liking, and then Click Create Workflow
You will see your Workflow summary page. From here, note down the workflow ID, (or leave this page open!) you’ll need it later when setting up the Zapier connection
Step 3: Create an API Token
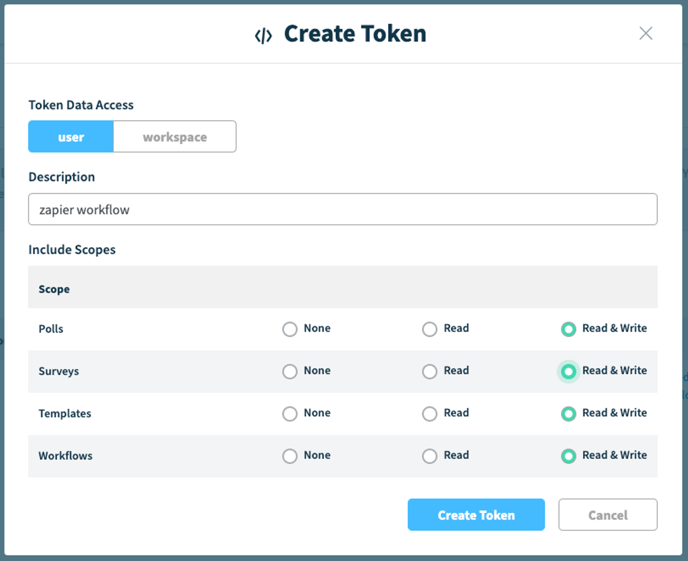
Go to API on the left nav, and under the Web API Tokens tab, click Create Token.
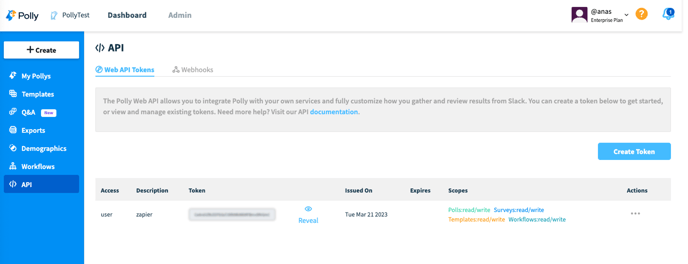
Make sure you include the Workflows Read & Write scope, and click Create Token
Click Reveal and then copy the token, you’ll need it when setting things up in Zapier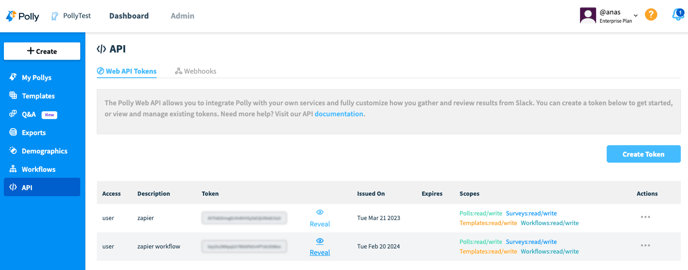
Step 4: Setting Google Calendar up in Zapier
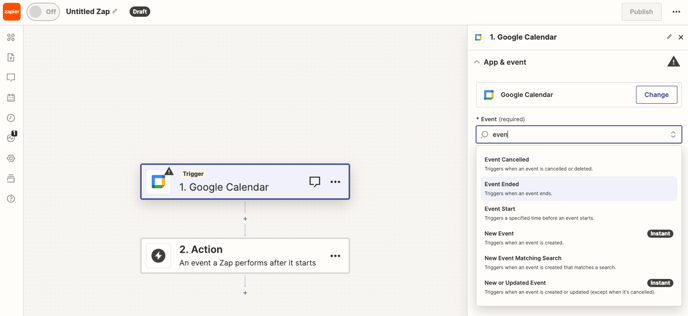
Create a new Zap, set the Trigger as Google Calendar, and then Event as Event Ended
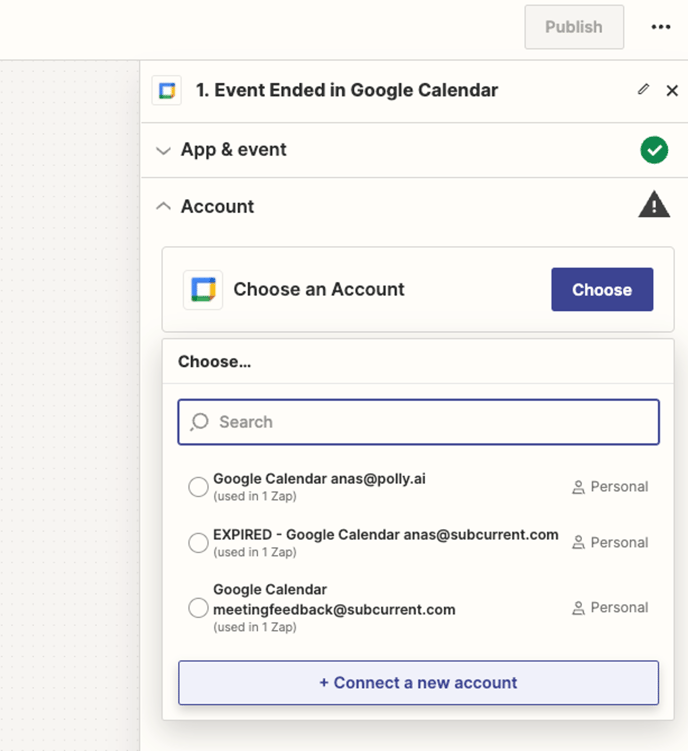
Choose or connect a new Google account (e.g. meetingfeedback@yourcompany.com) that will be used to search for events in Google Calendar.
Due to the way Zapier works, we’ll need an actual event on the chosen user’s calendar to read from before continuing. Head over to Google Calendar, and create an event that ends in few minutes from when you create it.
Invite the meetingfeedback@yourcompany.com account as an invitee, as well as a few fellow testers from your team who you can add to the invite.
Have some of them click Yes to accept the invite, and some of them click No to decline the invite. Make sure that the responses are collected before the end time of the event. This will allow you to test that the zap is only triggering pollys to people who accepted the meeting invite.
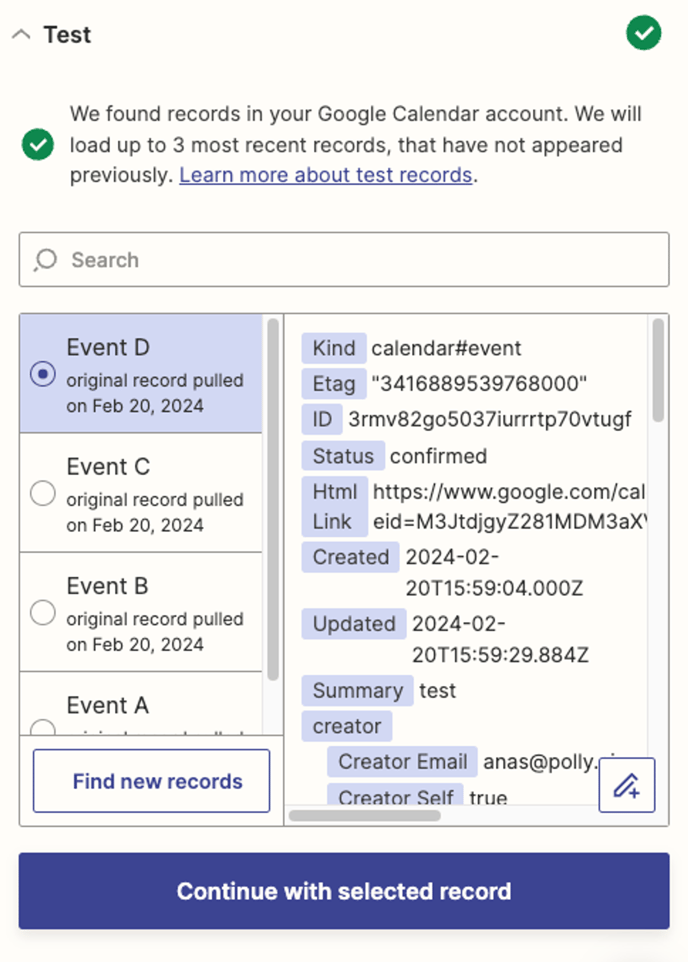
Wait until the event's end time has passed, then click Test, and then Find New Records until the event that you just created is displayed as an Event. You can identify your test event by looking for the title of the event in the Summary field of the record.
Once you've identified the event, Click Continue with selected record.
Step 5: Sending calendar event data to Polly
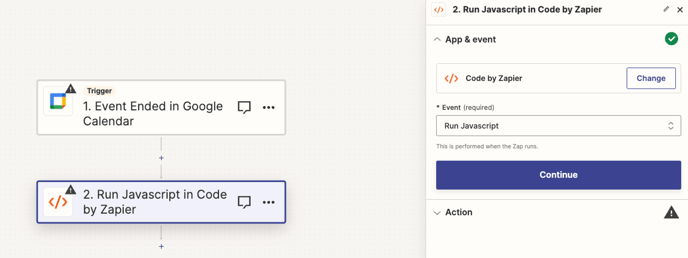
As the Action step step in Zapier, add Code by Zapier, and select Run Javascript as the Event
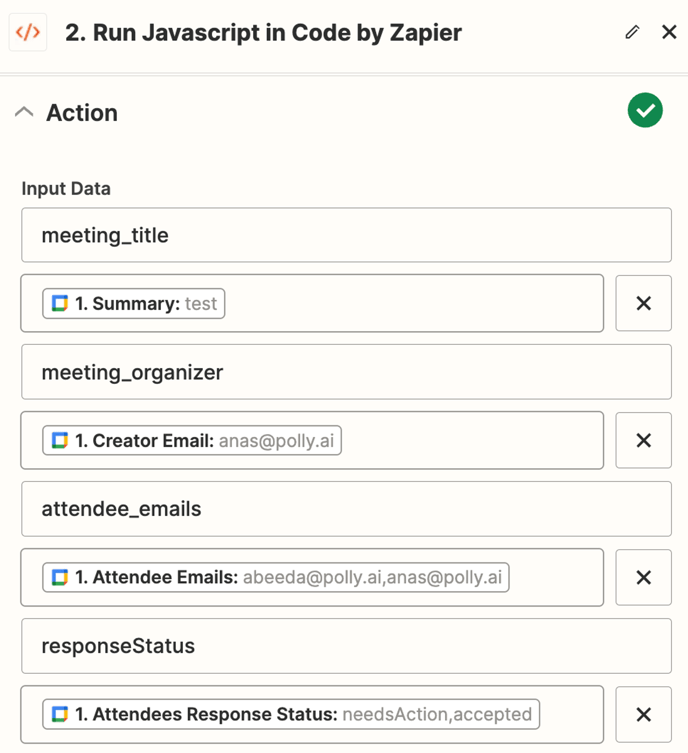
Setup the Actions with the input data as per the screenshot below, with the same API parameters that you use in the workflow setup step. The last parameter, responseStatus, helps ensure that only those invitees that attended the event receive the polly
In the code block below this paste the following code, but ensure to replace a) the email address for the shared calendar account, b) the placeholder values for API token from Step 2, and finally c) the workflow ID value from Step 3.
// Log input data for debugging purposes

console.log(inputData.meeting_title);

console.log(inputData.meeting_organizer);

console.log(inputData.attendee_emails);


// Check if the necessary input data is provided

if(inputData.attendee_emails && inputData.responseStatus) {

    // Split the attendee emails and response statuses into arrays

    let attendees = inputData.attendee_emails.split(',');

    let responseStatuses = inputData.responseStatus.split(',');


    // Loop through each attendee

    for(let i = 0; i < attendees.length; i++) {

        const attendee = attendees[i];

        const responseStatus = responseStatuses[i];


        // Check if the attendee's response status is 'accepted'

if(responseStatus === 'accepted' && !attendee.startsWith('meetingfeedback@yourcompany.com')) {


            // Prepare data for the API request

            const data = {

                "token":"paste-your-api-token-here",

                "id":"paste-your-workflow-id-here",

                "metadata": {

                    "meeting_title": inputData.meeting_title,

                    "meeting_organizer": inputData.meeting_organizer,

                    "attendee_emails": attendee,

                }

            }


            // Configure the API request settings

            const settings = {

                method: 'POST',

                headers: {

                    Accept: 'application/json',

                    'Content-Type': 'application/json',

                },

                body: JSON.stringify(data)

            };


            // Make the API request using the try-catch statement

            try {

                const fetchResponse = await fetch(`https://api.polly.ai/v1/workflows.trigger`, settings);

                const data = await fetchResponse.json();

                console.log("Response from Polly API (plain): " + fetchResponse);

                console.log("Response from Polly API (JSON): " + data);

            } catch (e) {

                // If an error occurs, return it

                return e;

            }

        }

    }

}


// Provide an output for the script

output = {id: 1, hello: "world"};
Note: If you want to exclude the meeting organizer from receiving the meeting feedback polly, you can edit the code above as follows:
Replace:if(responseStatus === 'accepted' && !attendee.startsWith('meetingfeedback@yourcompany.com')) {
With:if(responseStatus === 'accepted' && !attendee.startsWith('meetingfeedback@yourcompany.com') && attendee !== inputData.meeting_organizer) {
Step 6: Testing the workflow and viewing results
As the final step in Zapier, hit Test.
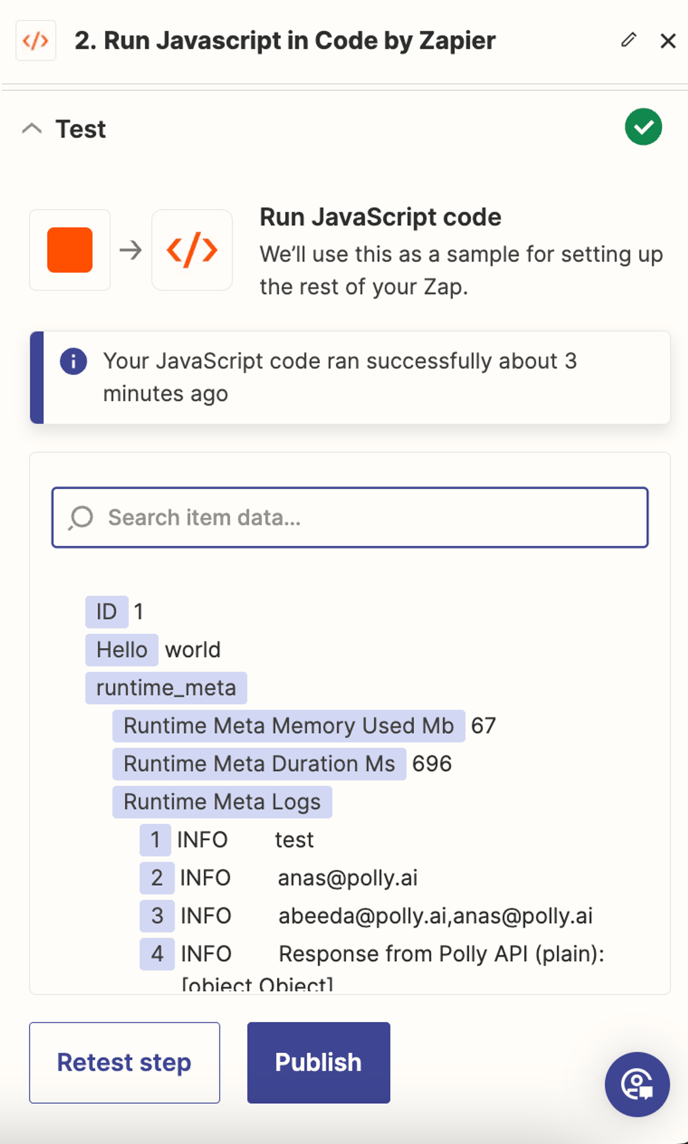
You'll know that the test was successful if you see Response from Polly API... as part of the response in Zapier.
Your polly will be sent to the users 1 min after the API is triggered — watch out for a message in
your DMs from Polly!
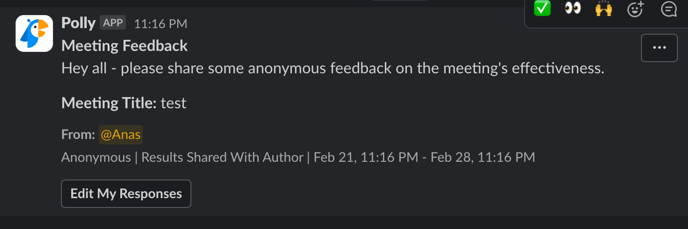
Fill out the polly, and ask one of your fellow testers to do so as well, so that you can see how results will look.
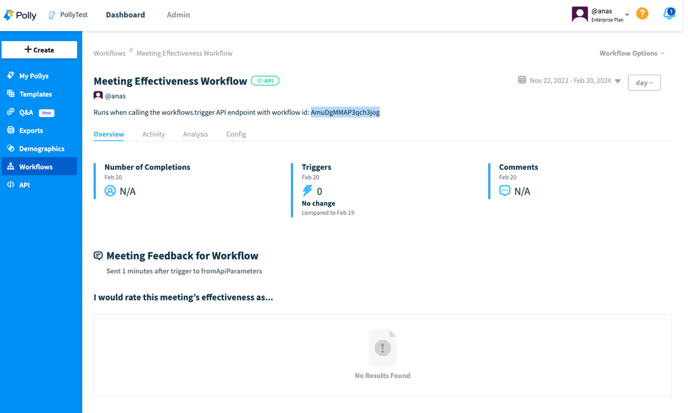
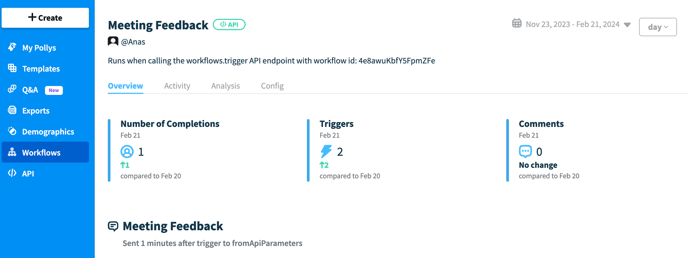
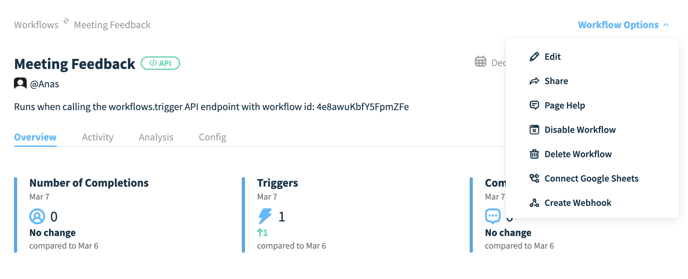
Back in the Polly Dashboard, you’ll be able to be able to see stats on triggers, completions, and details results. More information on workflow results can be found in our help doc here
If applicable, from the Workflow Options menu you can Share the workflow results dashboard with a colleague, or connect the results to a Google Sheet for further analysis.
And that’s it! Going forward, anyone in your company who invites the shared account to their meeting will be able to collect feedback from their attendees, all without leaving Slack.
Feel free to reach out to the Polly team in your shared Slack channel for any questions or support in getting this setup.