Getting Started
If you haven't installed the Polly app to Microsoft Teams yet, learn how to do so in this quick and simple guide!
Here is a quick video guide on setting and sending your first polly:
From where can I create a polly?
Pollys can be created by sending from chat or from the Polly personal tab.
If you haven't already, here's a quick video on Adding Polly to a Chat
Sending from chat
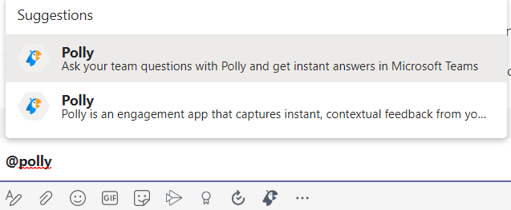
To create a new polly from chat, type @polly and you'll see the option to either start a quick polly, or start an advanced polly with the Poll Builder.
The quick polly allows you to input the polly question and options directly in the chat, without opening the polly builder. You can use any of the following formats, if you decide not to click on the quick polly option (which pre-populates it for you):
- @polly What should we order for lunch? pizza, sushi, sandwiches.
In this example, the question needs to have a question mark, and the options should be comma separated. - @polly What should we order for lunch? / pizza / sushi / sandwiches.
In this example, the question and each poll option need to be separated by a forward slash. - @polly “What should we order for lunch?” “pizza” “sushi” “sandwiches”.
In this example, the question and each option needs to be enclosed in double quotation marks.

- Begin by typing out the @polly command on chat, click on the suggestions tab that is prompted.
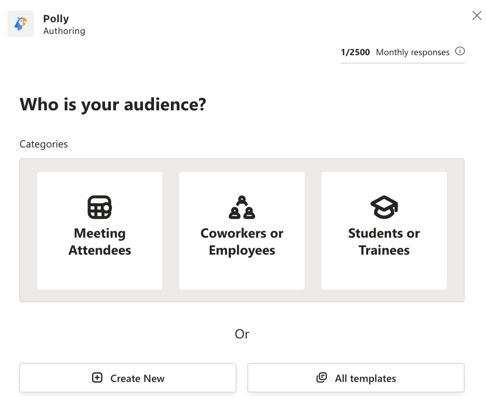
- The authoring window will display a selection of options, including the use of templates. Selecting Question will take you to the window for creating a new polly, with the full list of options and settings.
- From there, you can customize your polly by selecting your question type, determine scheduling, delivery, anonymity and the duration of how long you wish the polly to remain open.
To create a multi-question polly, click on ➕Add another question to add more questions to your existing polly.
- There is a maximum of 50 questions for multiple-question pollys. You also have the option of making the question Required for response. If you un-check the Required box then the answering of that question defaults to optional i.e. respondents can submit a polly response without answering this particular question.

- Under Polly Settings, you have multiple configurable options:
- Delivery: Choose to send the polly in the channel or as a DM to channel members.
- Results Visibility: Make results viewable in real-time, only after the polly closes, or hidden from the audience
- Anonymity: Making the polly responses anonymous or non-anonymous (note that if setting a polly as anonymous is a non-reversible action)
- Send: Schedule to send the polly at a future date/time or immediately
- Close: Set a close time for the polly after which respondents will not be able to vote on it
- Reminder: Choose to send a reminder to people who have not responded. You can set a timer for it go out automatically after a set time.
- Once you're all set, go ahead and click on Send Now!
💡Have you already created a polly but now want to update the close date? Editing feature let's you do that and a lot more!
✏️Note: The functionality of adding images/photos/pictures to your pollys is not available currently
While creating a polly, you can see a Preview on the right side of the creating window. This preview will show you how the polly will appear in the channel/DM for which you want it sent. You can interact with the Preview (during polly creation) just like a respondent who will receive the polly.